I had a blast being a part of the Midday Fix on WGN!
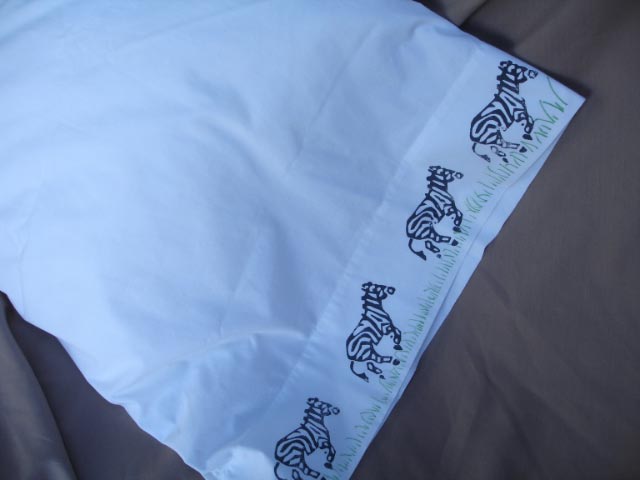
Slumber Party Pillow Bag Craft Project
Craft Supplies Needed
- Pillowcases that have been pre washed without fabric softener
- Stamps
- Fabric paint
- Sponge brushes
- Paper plates
- Colored permanent markers
- Piece of cardboard to put in between the layers of your pillow case
Project Instructions
- It is really important that your pillowcase has been prewashed with fabric softener.
- Decide what design you want on your pillowcase. If you use fabric paint (Tulip by Duncan or So Soft by Decoart) you can stamp all over your pillowcase and it will dry soft to the touch.
- Place your colors onto a paper plate. Use a sponge brush for each color. Use the brush to apply the paint to your stamp. I don’t recommend putting the stamp into the paint. It just makes a mess.
- Before you stamp place the cardboard inside your pillowcase and under where you are going to stamp. That way the paint won’t bleed thru to the other side. Stamp away!
- After you have stamped use the markers to draw in any detail. Let dry and set with an iron or in the dryer for about 10 minutes. Make sure it is completely dry first!!!
- Now you can enjoy your personalized, custom pillowcase. Bring it with you to any sleepover and make your friends jealous!
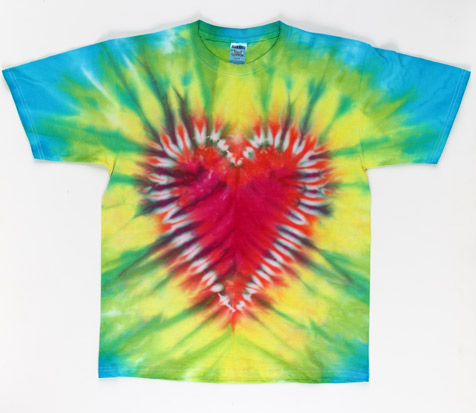
 I Heart Tie Dye
Designed by Pattie Wilkinson
Show your love for tie-dye fashion with a vibrant heart tee! Use bold Tulip® One-Step Dye™ and Tulip® Soft Fabric Paint™ for a look that’ll make you swoon.
Instructions
1. Prewash T-shirt; do not use fabric softener. Do not dry.
2. Protect work surface with Surface Cover then lay damp shirt on work surface.
3. Fold shirt in half vertically, with fold pointed toward the right.
4. Use a pencil to lightly draw half of a heart in center of shirt, beginning at fold.
5. Pinch the shirt along the pencil line with fingers, gathering all the way around the heart shape. Wrap a rubber band tightly around the heart section then wrap another rubber band 1” below first rubber band.
6. Wearing plastic gloves from box, add water to dye bottles, filling to line indicated on bottles. Replace caps tightly and shake bottles until dye is dissolved.
7. Squeeze Fuchsia dye onto heart section of shirt, getting dye close to rubber band. Squeeze Yellow into the 1” section below heart section, then squeeze Fuchsia onto remainder of shirt.
8. Cover shirt with Surface Cover to keep damp and let set 4 to 6 hours or longer for most intense colors. Fill washer to large load setting with cold water and a small amount of laundry soap. Cut rubber bands off shirt then wash separately on a large load setting with a small amount of laundry soap. Dry separately in dryer.
9. Insert Fashion Form between layers of shirt.
10. Squeeze puddles of Azalea and Berry Red Soft Fabric Paints onto a piece of foil. Mix colors with paintbrush then brush feathered lines along the edge of the heart as shown.
11. Let dry flat 2 hours. Wait 72 hours to wash.
See it done: http://www.youtube.com/watch?v=sl7mOF4ZJo8
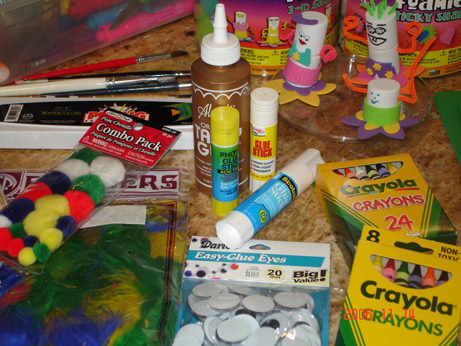
 Having an assortment of craft products on hand while the kids are home for the summer means it is super simple when you are ready to do art together!
Googly eyes, crayons, pipe cleaners, papers, paints, popsicle sticks, craft glue, feathers, pom poms, paint brushes. Add a few new things to your kid craft basket once in a while.


