I love children! They teach us to look at the world through fresh eyes and at a different height. “Look! A catterpillar!” They sing when they feel like it. They laugh with their whole bodies.
 This project is great for the budding imaginations of three and four year olds. These simple handmade puppets will take you and your kids just a few minutes to make, while the puppet theater will take about an hour.
It’s also a fun project for slightly older siblings to put on a show for the younger ones or the whole family!
Handmade Puppets
Materials Needed:
For Photo Rod Puppet:
One of the following: dowell, skewer or straw
Photo (one you don’t mind cutting)
Construction paper
Glue
For Wooden Spoon Puppet:
Wooden spoon (one you won’t cook with again)
Yarn
Paint or markers
Piece of fabric
Scissors
For Marionette Puppet:
Pompoms (3 or 4 little yarn balls)
Little feathers (or any feathery-like material)
Popsickle stick
String
Tiny piece of felt (yellow)
Pair of tiny eyes
Glue
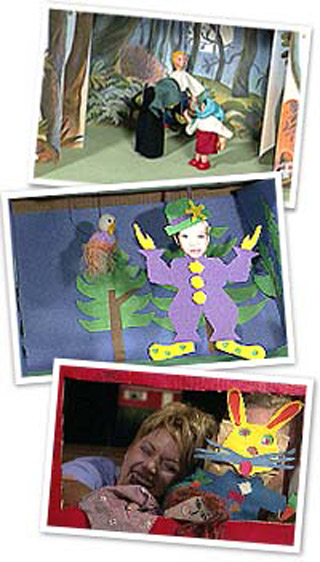
For the Photo Rod Puppet: Our puppet expert took a photo of a child, cut out the face and glued that onto a body made out of construction paper. You can make your own or cut out figure from an old greeting card, wrapping paper, etc. Simply glue a stick or skewer (We used a straw!) onto the back of your character.
For the Wooden Spoon Puppet: The part of the spoon you used to stir with is now the head of your new puppet! Glue a little yarn around the edge for some hair. Paint or draw on a face. Cut out a little square or triangle of fabric, gather it around the neck area and glue it down. With a pair of scissors, cut out a small hole on each side for a finger.
For the Marionette Puppet: One pompom will become the head of your bird marionette. The others glued together will make up the body. Glue all of the pieces together until you’ve created something that looks like a bird. Glue feathers onto the sides, a little felt beak and eyes on the head. Take a nice piece of string or thread and glue the center of it onto the popsickle stick. Glue each end of the string onto each side of your bird.
Helpful Hints:
Materials for toy theaters and handmade puppets are often found around the home or you can pick them up in any craft store.
Toy Theaters
Materials Needed:
For Marionette Stage:
Cardboard box (Ours measured 12 inches by 12 inches by 8 inches.)
Construction paper (various colors to decorate interior walls)
Tape
Spray paint
Exacto knife
Glue
For Hand Puppet Stage:
Cardboard box (Ours measured 16 inches by 18 inches.)
Spray paint
Construction paper (or markers, stickers, etc.)
Sheer fabric for curtain
Glue
Tape
Exacto knife
Step 1:
To make a marionette stage, start with a fairly clean box. Place the box with flaps open, away from you. Using the Exacto knife (Adults only, please!), cut out a hole in top of the box (Ours measured 4-1/2 inches by 11-1/2 inches, allowing for a 3-1/2-inch border on each side).
Step 2:
You can cover the exterior sides with either construction paper or spray paint. If you choose to paint, be sure to do it outdoors. If you prefer paper, use tape to hold it down. (We chose green construction paper.)
Step 3:
Next, cover the top of the box with construction paper. Cut out a rectangle smaller than the hole cut out of the box. Cut slits at each inside corner and fold the tabs down, taping them to the inside of the box.
Step 4:
Cover inside walls of box. We used three pieces of blue construction paper (measuring 12 inches by 18 inches) covered with four cutouts of trees, each made from brown and green construction paper. The trees were glued before the paper was taped in place. For the floor, we used two pieces of green construction paper (One measured 12 inches by 18 inches; the other 6 inches by 18 inches). For the top, use a 6-inch-by-18-inch piece of blue construction paper. You can also create clouds by tearing out pieces of white paper and gluing them onto the blue construction paper.
Step 5:
To make a hand puppet stage, use another cardboard box (Ours was 16 inches by 18 inches). Cover or decorate the outside of box using construction paper, markers, stickers, etc. We spray painted ours red.
Step 6:
This next step is for an adult! Cut out a hole in the bottom of the box (Ours measured 13 inches by 15 inches.) using the Exacto knife. Tape flaps down inside box and, using sheer fabric, glue in a curtain on the inside of box at center.
 For more things you can create and do with your little kids check out some of my featured videos on Favecrafts!
